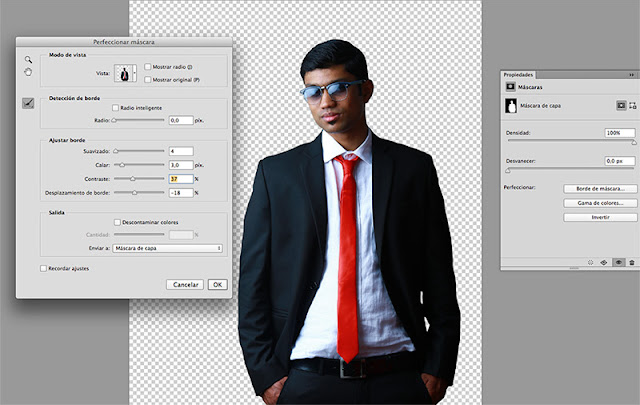
Dramatic Portrait Retouch Tutorial Photoshop portrait effects step by step -- Step 1 Crop the model from the original background using and selection tool. I used the Pen Tool (P) because it’s more precise. Once you created the layer mask and the background is hidden, refine the edges using the Refine Edge tool . Step2 Open the background image and blur it using any blurring filter. I used the Gaussian Blur filter. Blur it like in the image below, until you cannot distinguish the details anymore. Put the model over the new blurred background. Step 3 Create a new layer above the portrait layer and clip it to the portrait. Use the Spot Healing Brush Tool to eliminate imperfections not only on the skin. Next create a new layer above the previously created one and clip it to the layer below too. Now use the Mixer Brush ...